Indoor Vegetable Gardening for Beginners: The Complete Apartment Guide
You don’t need a balcony to grow food. A windowsill, a shelf, or the corner of a table will grow salad greens, herbs, and microgreens all year — and once the balcony gets too cold for anything, indoors is where the growing moves anyway. This is indoor vegetable gardening for beginners in the plainest sense: what actually grows well inside an apartment, the four things that decide whether it works, and how to set up your first crop this week without a grow tent, a spare room, or anything more complicated than a small light on a timer.
It’s also honest about the limits. Growing indoors is not a way to raise a summer’s worth of tomatoes on a kitchen counter. It’s a smaller, faster set of crops — the ones that are happy with a modest light and get harvested young — plus, if you want a project, one compact fruiting plant under a proper panel. Get the expectations right and it’s one of the most satisfying things you can do in a small space. Everything below assumes you’ve never used a grow light and have no idea where to start.
This post contains affiliate links, meaning we may earn a small commission at no extra cost to you — full details are on our Affiliate Disclosure page.
Quick answer: Start with microgreens or loose-leaf lettuce, not tomatoes. Put them under a small white LED grow light 6–12 inches above the leaves, on a timer for 14–16 hours a day, because even a bright window is too dim for most crops from October to March. Use pots with drainage holes and bagged potting mix (1–1½ inches in a tray for microgreens, 6–8 inches deep for greens), keep the room at 70°F or below, and water only when the top inch of mix is dry. Microgreens are ready in one to three weeks, baby lettuce in about four.
In this guide: What grows indoors · Light · Containers · Temperature · Watering · Crop list · First crop · Setups · Mistakes · FAQ · All guides
Growing outdoors or at a sunny window instead? Start with our container vegetable gardening for beginners guide, which walks one outdoor pot from empty to first harvest.
What Indoor Growing Is (and Isn’t)
Inside, you are the weather. That’s the whole appeal and the whole challenge. Outdoors the sun does the heavy lifting and you supply water; indoors you supply everything — the light, the warmth, the moving air — and the plants get exactly as much as you give them, no more. So the crops that do well inside are the ones that ask for the least:
- Microgreens. Cut at 7–21 days, while they’re still running mostly on the energy stored in the seed. They still need light to green up: University of Maryland Extension says a sunny window may do, but they grow best under a light. On a dim counter they come up pale and floppy.
- Salad greens and pea shoots. Loose-leaf lettuce, spinach, arugula, baby kale, pea shoots. Under a small light and harvested a few leaves at a time, they give you steady salad from November through March.
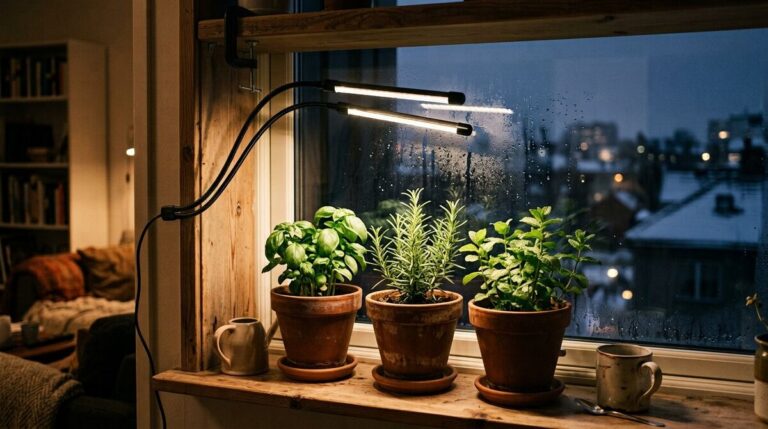
- Herbs. Basil, parsley, chives, and mint from a nursery pot, plus the rosemary and thyme you bring in from the balcony before frost. A bright windowsill does most of the work; a clip-on light covers the dark months.
- Scallions and regrowth. Scallion bases from the grocery store regrow in a jar of water within days, and potted up they keep producing for a while, though each regrowth comes back a little thinner.
- Seedlings for spring. The indoor garden’s second job. Tomatoes, peppers, and brassicas started on a lit shelf in February and March are the healthiest transplants you’ll ever put on a balcony.
- The project tier. A dwarf tomato, a compact pepper, or bush beans under a 100-watt-class panel. Worth doing once you’ve had a winter of greens go well. Not where to start.
And what doesn’t work: full-size tomatoes, cucumbers, squash, corn, and most root crops. They need more light, space, and time than a window and a small lamp can give, and trying them first is how most people decide indoor growing “doesn’t work.” It does — for the list above. Save the big crops for outside; our guide to the best vegetables for pots covers those.
The Four Things That Decide Everything Indoors
Every indoor growing problem — leggy seedlings, pale lettuce, a basil plant that quietly gives up in December — traces back to one of four things: light, the container and what’s in it, temperature and air, or water. Get those four roughly right and the plants do the rest. Here’s each one in the order it matters, starting with the one that beginners get wrong most.
Light: The Part Every Beginner Underestimates
A window that looks bright to you is dim to a plant. Our eyes adjust; leaves don’t. Even a south-facing window that gave a pot of basil 6 hours of direct sun in July might manage 2 or 3 in December, with the sun low and the days short — and a north- or east-facing window, or any window with a building across the street, gives less than that all year. The result is the same every time: seedlings that stretch and flop, lettuce that stays thin and pale, basil that goes leggy and stops. It isn’t the care. It’s the light.
A quick test: hold your hand a foot above the plant at midday. A sharp, dark-edged shadow means enough light for herbs on a windowsill in summer. A soft, fuzzy shadow — which is what most apartment windows give from October to March — means you need a grow light for anything you want to grow well.
What a Small Grow Light Actually Needs to Be
- Full-spectrum white, not purple. A white LED in the 4000K–6500K range grows greens and herbs as well as the red-and-blue “blurple” panels do, costs less, doesn’t turn the room pink, and lets you see whether the plants are actually healthy.
- Matched to the area you’re growing, not to a wattage number. Ignore “equivalent watts” in listings. Think in footprints instead: a clip-on gooseneck light covers 2–4 pots or a single tray; slim LED strips mounted under a shelf cover a 2-foot shelf of trays; a hanging 100-watt-class panel covers a 2×2-foot table and is the only kind that handles a fruiting crop. Most beginners need the first one.
- On a timer. Consistent hours matter more than any other feature, and “I’ll switch it on when I remember” is the number one reason indoor greens grow slowly. Some clip-on lights have a timer built in — the GooingTop clip-on we recommend does. For anything else, a cheap plug-in outlet timer between the wall and the light does the job.
- Close to the plants. Small LEDs only work up close: 6–12 inches above the leaves for a clip-on or strip lights, 18–24 inches for a panel. A light mounted 2 feet above a tray of lettuce does almost nothing. If the plants stretch and lean, lower it; if the leaves nearest it curl or bleach, raise it.
Run it 12–16 hours a day for herbs (Illinois Extension), about 16 for microgreens (University of Maryland Extension), and 14–16 for lettuce and other greens, and always give the plants a dark period overnight — 24-hour light doesn’t speed anything up. Run it during the day so it adds to whatever light the window gives. And expect to water more once the light goes on: plants that are actually growing dry out faster than plants coasting through a dim winter.
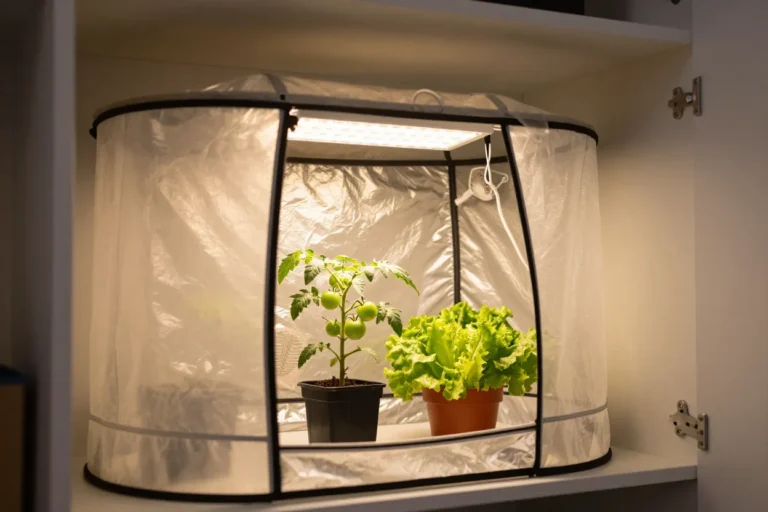
Our grow lights for small-space herbs guide walks through the clip-on in detail and is the right first purchase for a windowsill. For a whole shelf of lettuce and greens you’ll want more coverage than one clip-on gives — we’ve compared five vegetable-grade lights, from a single screw-in bulb to a fully lit shelf unit, in our guide to the best grow lights for indoor vegetables. And no, you don’t need a grow tent. A tent is for running fruiting crops in a cold garage or basement; for a shelf of greens in a heated apartment it adds cost and nothing else.
Containers and Potting Mix: The Indoor Rules
Container rules indoors are the same as on a balcony, with one addition: whatever drains out of the pot lands on your floor. So every pot needs drainage holes, and every pot needs a saucer or tray under it — no exceptions, including the handsome ceramic one with no hole. (Put a plastic nursery pot inside it and use the ceramic as the saucer.) Beyond that, it’s mostly a question of depth:
- Microgreens and pea shoots: 1–1½ inches of mix in a shallow tray. A standard 10×20-inch seed tray, or a takeout container with holes punched in the bottom, is all it takes.
- Lettuce, spinach, arugula: 6–8 inches deep (8 is better for spinach). Windowboxes, tubs, and 8-inch pots all work; width matters more than depth for greens, because you’re growing a carpet of leaves, not a root.
- Herbs: 6–8 inches for basil, parsley, chives, and mint. Rosemary and thyme are happy in the same size and prefer it slightly dry.
- Scallions: 4–6 inches. A small pot holds a dozen.
- A dwarf tomato or compact pepper (the project tier): a 3–5-gallon pot, which is a real object in a small apartment. Our tomatoes in a 5-gallon bucket guide covers the pot setup that suits it best.
Fill them with bagged potting mix, never garden soil or “topsoil.” Soil from outside compacts in a pot, drains badly, and brings fungus gnats and disease into the apartment with it. A standard all-purpose potting mix is fine for everything on this page; our soil and fertilizer basics guide explains what’s in it and why it matters. Two containers earn a special mention indoors: self-watering planters, which feed the roots from a reservoir underneath, keep greens and herbs evenly moist, and don’t drip on the floor (the self-watering system on our gear page is built for a tomato; smaller windowsill versions work the same way), and fabric grow bags, which are excellent for the project-tier tomato but weep through their sides, so they need a tray. For the full set of container rules — sizes, drainage, what to do about the saucer — see pot size and drainage.
Temperature, Air, and Humidity
This is the part an apartment mostly gets right for free, with a few traps worth knowing about.
- Room temperature is fine — cooler is better for greens. Lettuce, spinach, and microgreens are happiest at 60–70°F, which is the cool end of a heated apartment, and they turn bitter or bolt if it’s hot. Herbs do best at 70°F and below (Illinois Extension); the project-tier tomato likes 65–75°F. Nothing on this page needs a heater.
- Beware the radiator sill and the cold glass. The classic windowsill spot is often the worst one: a radiator underneath cooks the roots by day, and single-pane glass chills any leaf touching it at night. Pull pots an inch or two off the glass, and if a sill sits over a heat source, use a shelf beside the window instead.
- Move the air. Still indoor air is where seedlings damp off and mold gets started on the surface of the mix. A small fan on low, pointed across the plants rather than at them, for a few hours a day gives you sturdier stems, drier leaves, and fewer gnats. An open window in the next room does a rough version of the same thing.
- Winter air is dry. A heated apartment in January often sits at 20–30% humidity; plants prefer 40–60%. You can’t fix that cheaply, and you don’t need to — it just means pots dry out faster than the cool temperature suggests. Grouping plants together helps a little. Checking the soil more often helps a lot.
Watering and Feeding Indoors
Overwatering kills more indoor plants than everything else combined, and it happens because indoor pots are watered on a schedule instead of on need. Don’t water on Sundays. Push a finger an inch into the mix: dry, water; damp, wait. When you do water, water thoroughly, until it runs into the saucer — then empty the saucer twenty minutes later, because roots sitting in a puddle rot. A tray of lettuce under a grow light in dry winter air might need water every second day; the same tray in a cool corner in a damp week might go seven. The finger knows; the calendar doesn’t.
For microgreens and seed trays, water from below: set the tray in an inch of water for ten minutes and let the mix drink upward. It keeps the leaves dry, doesn’t flatten seedlings, and helps against fungus gnats — those tiny flies that hover over houseplants — because their larvae need moist mix. If gnats turn up anyway, let the top 1–2 inches of mix dry out between waterings (University of Minnesota Extension’s advice) and hang a yellow sticky trap beside the pots. They’re a nuisance, not a disaster.
Feeding is simpler indoors than out. Fresh potting mix carries enough nutrition for the first 4–6 weeks, and microgreens never need feeding at all — they’re cut long before they’d use it. After that, greens and herbs want a liquid fertilizer at half the strength on the label every 2–3 weeks while they’re actively growing, and nothing in the darkest weeks of December when growth stalls anyway. More feed does not make up for less light; it just makes salty soil.
What to Grow Indoors: A Beginner’s Crop List
Roughly in order from easiest to most demanding. “Window” means a bright sill with no extra light; “grow light” means a small clip-on or strip light on a timer.
| Crop | Light it needs | First harvest | Container | Notes |
|---|---|---|---|---|
| Microgreens (broccoli, radish, pea, sunflower) | Bright window; best under a small light | 7–21 days | Shallow tray, 1–1½ in of mix | Sow thickly, cover for 2–4 days, cut once with scissors |
| Pea shoots | Window or grow light | 2–3 weeks | Shallow tray | Cut above the lowest leaves and they’ll grow a second flush |
| Scallions | Window | Days (regrown from bases); 6–8 weeks from seed | 4–6 in pot | Stand store-bought bases in water, then pot them up |
| Loose-leaf lettuce | Grow light, 14–16 hours | 3–4 weeks for baby leaves | 6–8 in deep, wide | Pick outer leaves and it keeps going for months; bolts if warm |
| Spinach and arugula | Grow light | 3–5 weeks | 6–8 in deep | Both like it cool; arugula is the fastest |
| Baby kale and chard | Grow light | 4–6 weeks | 6 in deep | Slower to start, then months of picking |
| Basil, parsley, chives, mint | Bright window plus a clip-on from October to March | Immediately from a nursery plant; 4–8 weeks from seed | 6–8 in pot | Buy plants rather than sowing for a first attempt |
| Rosemary and thyme | Brightest window you have | Ongoing (brought in from outside) | 6–8 in pot | Water sparingly; they hate wet feet |
| Dwarf tomato or compact pepper (project tier) | 100-watt-class panel, 16 hours | About 3 months from seed | 3–5 gallon | Shake the flowers to pollinate; a winter project, not a grocery replacement |
Three of these have their own guides: microgreens without sunlight is the fastest first crop in any apartment, indoor winter vegetable gardening walks through the greens that are worth the shelf space, and windowsill herb care for basil, rosemary, and mint covers the herbs. For fitting lettuce into the pot you actually have, how many lettuce plants per container has the spacing.
Your First Indoor Crop: One Tray, One Light, One Harvest
Don’t set up an indoor garden. Set up one crop, harvest it, and then decide. Here’s the version that works in almost any apartment:
- Pick one thing. A tray of microgreens is the fastest win; an 8-inch pot or a short windowbox of loose-leaf lettuce is the one that keeps giving. Not both, not yet.
- Pick the spot. A shelf, counter, or table near an outlet, away from a radiator, with a tray underneath. It doesn’t need to be by a window if there’s a light.
- Set the light. Clamp the clip-on to the shelf edge with the heads 6–10 inches above where the leaves will be, and set the timer to 14 hours, running through the day. Microgreens in a bright south window can skip this step, though they’ll be sturdier under the light.
- Sow. Wet the potting mix in a bucket first — it should feel like a wrung-out sponge — then fill the container. Microgreens: scatter seed thickly enough that seeds almost touch, press it in, and cover the tray with an upturned tray or a sheet of cardboard for 2–4 days. Lettuce: sprinkle 8–10 seeds across an 8-inch pot, barely cover, and thin to the strongest 3–4 once they’re up.
- Water from below for the first two weeks, and check the mix with a finger every day. That daily look is also how you’ll catch stretching seedlings (lower the light) or a gnat problem (let it dry out) early.
- Harvest. Microgreens at 7–21 days, cut just above the mix with scissors, the whole tray at once. Lettuce from about week three: take the outer leaves, leave the center, and it keeps producing for months.
- Sow the next one the day you harvest. One tray always coming is the whole system. Once that rhythm feels easy, add a second pot, a second crop, or a second shelf — one at a time.
That’s the method at every scale. A lit shelf with six trays is this same loop run six times, and a winter tomato under a panel is this same loop with a bigger pot and a longer wait.
Indoor Growing Through the Year
Indoor growing has seasons too — they’re just the mirror image of the balcony’s.
- Fall (September–November): the move-in. Bring in the herbs that are worth saving before the first frost — our guide to overwintering herbs sorts the keepers from the ones to let go, and how to check them for pests first. Sow the first indoor greens while the balcony finishes its fall spinach, and switch the grow light on as the days shorten. Our Fall Container Garden Guide maps the whole transition, including frost protection for the pots that stay outside.
- Winter (December–February): the main indoor season. Greens and microgreens on rotation under the light, herbs on the sill, and — from mid-February — the first seed trays for spring on the same shelf. Expect growth to slow in the darkest weeks even under a light; it picks up noticeably by late January.
- Spring (March–May): the move-out. Seedlings harden off on the balcony a few hours at a time before they go out for good; the last indoor lettuce finishes as the apartment warms up; the light’s hours drop as the window’s rise. Our 30-day container setup plan is written for fall, but the same sequence in reverse is the spring plan.
- Summer (June–August): indoors is for microgreens and a pot of basil. Lettuce and spinach bolt in a warm apartment, and the balcony is doing the real work anyway. Let the shelf rest, or keep one tray of microgreens going for sandwiches.
Three Simple Setups That Work
Almost every successful apartment garden is one of these three, and most people start with the first and grow into the second.
- The windowsill. Two to four pots on the brightest sill or a shelf beside it, with a clip-on grow light clamped above for the dark months. Herbs, a pot of loose-leaf lettuce, scallions in a jar. This costs less than a takeout dinner beyond the pots, needs nothing drilled or mounted, and is where most people should start.
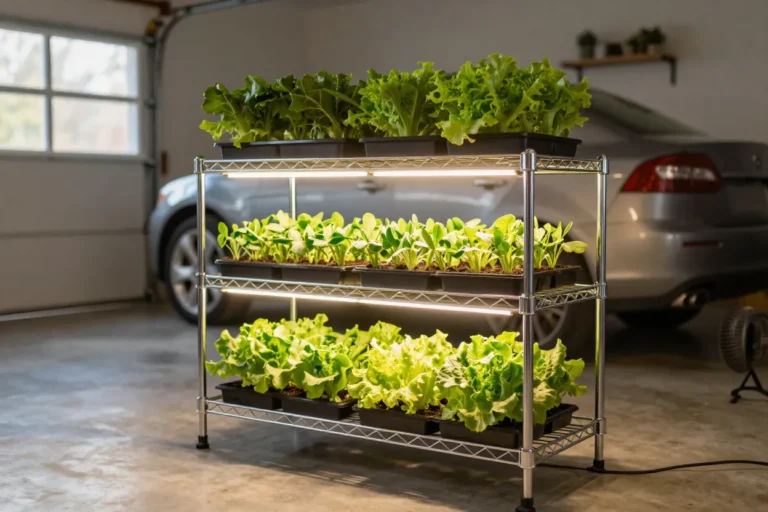
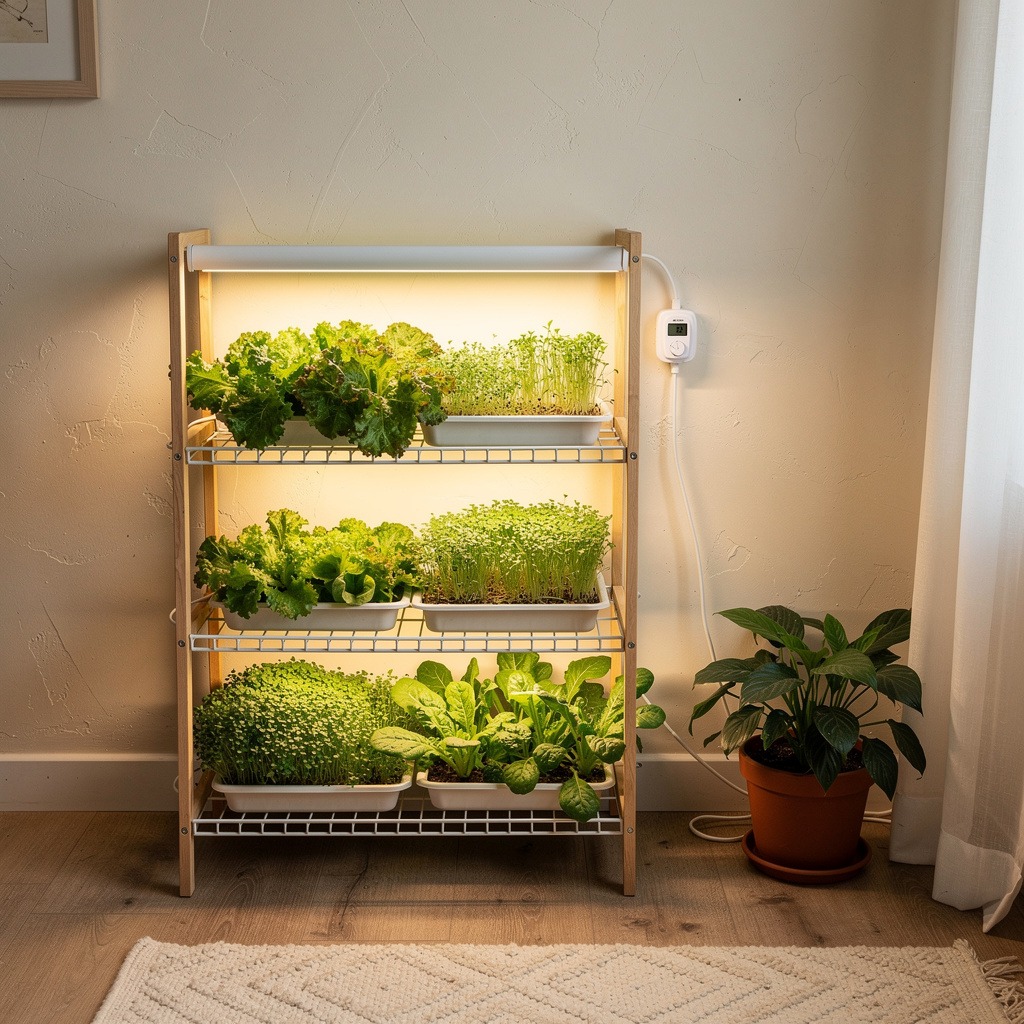
- The shelf. A bookshelf or wire rack with slim LED strip lights zip-tied under one or two shelves, trays of greens and microgreens on the lit shelves, a plug-in timer, and a tray under everything. This is the setup most indoor vegetable growers end up with: it grows a real supply of salad through winter and every seedling you’ll need in spring, and it packs flat when you move. Renters can build it without touching a wall.
- The table or corner. A hanging 100-watt-class LED panel over a 2×2-foot table or corner, one 5-gallon pot with a dwarf tomato or a pepper in the middle, and greens in smaller pots around it. This is the project tier — more light, more electricity, more attention, and the first setup on this list that can actually give you a tomato in February.
If the only space you have spare is a garage, a basement, or a spare room that’s too cold or too dark for any of these, that’s the one situation where a small grow tent starts to earn its place — a different setup with its own rules around cold, ventilation, and the car, which we cover separately in our guides to growing vegetables in a garage and to small grow tents for vegetables. For an apartment, one of the three setups above is all you need.
Common Mistakes
- Relying on the window. The most common one, by a distance. A window that feels bright grows leggy, pale plants from October to March. Buy the light before the seeds.
- Buying the light and skipping the timer. Inconsistent hours are the number one reason indoor greens grow slowly. If the light doesn’t have a timer built in, the outlet timer goes in the same basket.
- Mounting the light too high “to be safe.” Small LEDs only work within a foot of the leaves. If seedlings stretch and lean, lower it.
- Watering on a schedule. Overwatering is the top indoor killer. Finger in the mix, every time, and empty the saucer.
- Garden soil in the pot. It compacts, stays wet, and imports fungus gnats. Bagged potting mix, always.
- Starting with a tomato. It’s the crop everyone wants and the one most likely to fail indoors. Grow a winter of greens first, then treat a dwarf tomato as a project.
- The radiator sill. Hot roots by day, cold leaves against the glass by night. Move the pots a foot sideways onto a shelf.
- Sowing everything at once. Six trays of lettuce sown on the same day ripen on the same day. Sow a tray every week or two instead and there’s always one ready.
- Buying a grow tent for a heated apartment. Unless you’re growing fruiting crops in a cold room, it’s money spent solving a problem you don’t have.
Frequently Asked Questions
What vegetables are easiest to grow indoors?
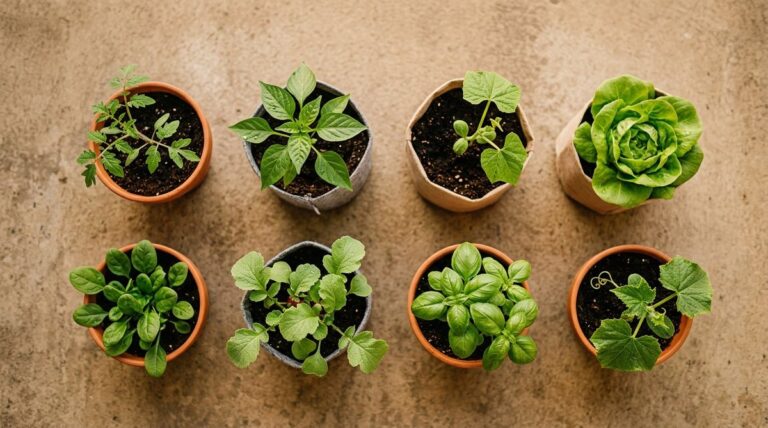
Microgreens, pea shoots, loose-leaf lettuce, arugula, spinach, scallions and potted herbs. They are small, fast and happy with modest light. Full-size tomatoes, cucumbers, squash and most root crops need more light and space than an apartment can give.
Do I need a grow light to grow vegetables indoors?
For most crops from fall to early spring, yes. Illinois Extension recommends lights 6 to 12 inches above lettuce and herbs for 14 to 16 hours a day, and University of Maryland Extension says even microgreens grow best under lights. A bright south window alone works mainly for herbs in summer.
How many hours of light do indoor vegetables need?
About 14 to 16 hours a day under a grow light for lettuce and other greens, around 16 for microgreens and 12 to 16 for herbs. Give plants a dark period every night; 24-hour light does not speed them up.
How deep should containers be for indoor vegetables?
1 to 1 1/2 inches of mix in a tray for microgreens, 6 to 8 inches for lettuce, spinach and herbs, and 3 to 5 gallons for a dwarf tomato or pepper. Every pot needs drainage holes and a saucer.
How do I get rid of fungus gnats on indoor vegetables?
Let the top 1 to 2 inches of mix dry out before watering again, empty saucers, and hang yellow sticky traps near the pots. University of Minnesota Extension notes the larvae live in moist soil, so drier mix breaks their cycle.
Can I grow tomatoes indoors in an apartment?
A dwarf variety, yes, as a winter project: a 3 to 5 gallon pot under a hanging LED panel for about 16 hours a day, with the flowers shaken to pollinate them. Grow a winter of greens first.
Sources we checked
- University of Illinois Extension: Grow Herbs and Lettuce Indoors This Winter
- University of Illinois Extension: Keep Growing With Herbs Indoors This Fall, Winter
- University of Maryland Extension: Growing Microgreens and Baby Greens Indoors
- University of Minnesota Extension: How to Treat Pesky Fungus Gnats in Houseplants
Every Indoor Growing Guide on the Site
This page is the hub for our Indoor Growing section. Each guide below goes deep on one piece of what’s above, and they’re grouped by the question you’re most likely asking.
Start with these
- How to Grow Microgreens Without Sunlight — the fastest first crop, grown under a small light instead of a window.
- Indoor Winter Vegetable Gardening: What’s Actually Worth Growing — the honest shortlist of greens that pay off under a small light.
- Best Grow Lights for Small-Space Herbs — do you need one, what matters, and the one clip-on we’d buy for a windowsill.
Pots, mix, and water
- Pot Size and Drainage: The Container Rules That Actually Matter — depth by crop, holes, and saucers.
- Soil and Fertilizer Basics for Container Vegetables — what’s in potting mix and when to feed.
- How Many Lettuce Plants per Container? — spacing by pot size, so a lit tray isn’t crowded.
Herbs indoors
- Basil, Rosemary & Mint: Complete Windowsill Herb Care — the three herbs most people grow inside, and why each one fails.
- Overwintering Herbs: Which Ones to Bring Indoors Before the First Frost — the keepers, the ones to let go, and the pest check before they come in.
- Grow Your Own Thanksgiving Herbs Indoors — a week-by-week sage, thyme, and rosemary plan for fresh herbs on the holiday table.
Moving in and out with the seasons
- Your Fall Container Garden Guide — the whole balcony-to-indoors transition in one page.
- Fall Container Setup: Your 30-Day Plan — a week-by-week sequence for the shoulder season.
- Frost Protection for Containers — for the pots that stay outside while the greens come in.
- Growing Spinach on a Balcony in Fall — the last outdoor crop before the light goes on.
The project tier
- Tomatoes in a 5-Gallon Bucket: What Actually Works — the pot setup for a winter tomato under a panel.
- Best Vegetables for Pots: Container Sizes for 8 Easy Crops — the sizes for everything you’ll move outside in spring.
Lights, tents, and garages
- Best Grow Lights for Indoor Vegetables — five vegetable-grade lights, from a screw-in bulb to a fully lit shelf.
- Best Grow Tents for Vegetables — when a small tent earns its place, and which size.
- Growing Vegetables in Your Garage — cold, ventilation, and the car.
That’s the whole of indoor vegetable gardening for beginners: one light, one tray, one harvest, repeated. New to growing food in a small space altogether? Start Here is the ten-minute version of the whole site. And the clip-on light, potting mix, and self-watering planter mentioned above — along with everything else we actually use — are on our Recommended Gear page.
If a plant is struggling despite all this, our guide to diagnosing dying container vegetables by symptom covers the common causes indoors and out.